

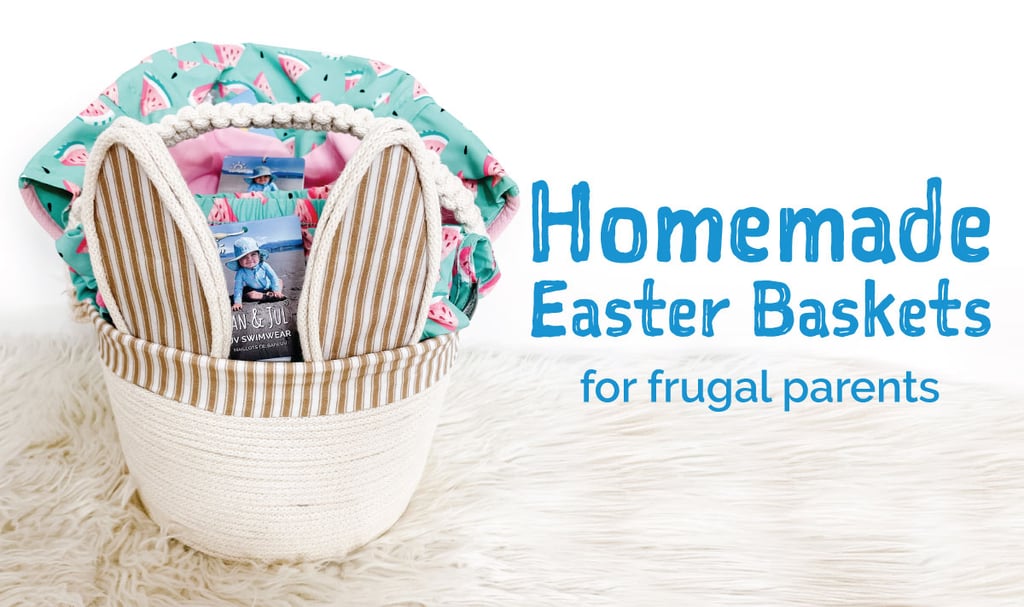
Homemade Easter Baskets for Frugal Parents
Are you ready to turn your recycling into the MOST ADORABLE homemade Easter baskets? Hi, I’m Jackie from Sew Bright Creations ! I’m a DIY Blogger and mom of 2 living in Northern BC. In my corner of the internet, you’ll find all things creative, whether it’s a kid’s craft or renovating our home. No matter what I’m working on, I always try to be mindful of the supplies I’m using for two reasons. First, I don’t like to be wasteful and secondly I try to be frugal because we all know, inflation is real! I am also working on being more intentional with the things I buy and giving more experience-based gifts.
In this post, I’ll show you how to make homemade Easter baskets using what you may already have at home! Plus, I’ll share which Practical Easter Basket Stuffers I put in for my kids. Make sure to read through for all details because I figured out several tricks while making it!
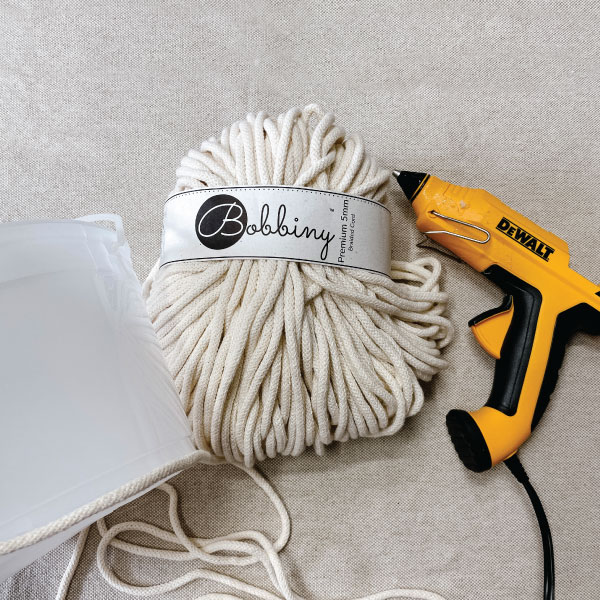
Step 1:
Clean out a 4L ice cream pail. Starting at the bottom, use hot glue to secure rope around it. I used 5mm Premium Braided Rope because I had it on hand. You could also use macrame cord or other craft rope you already have at home!
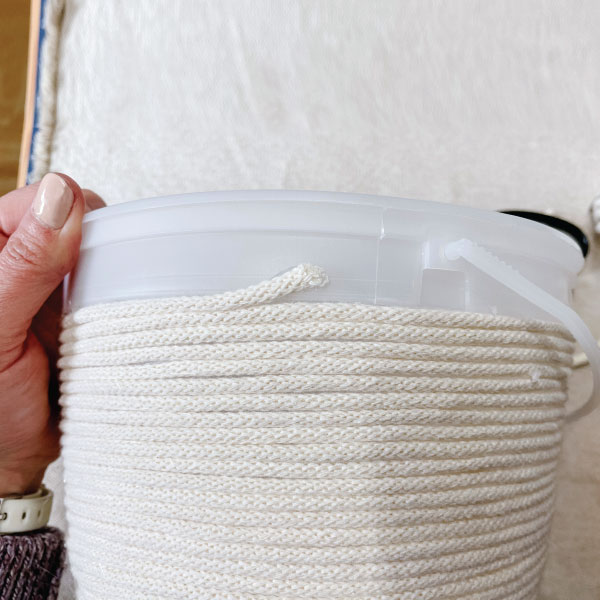
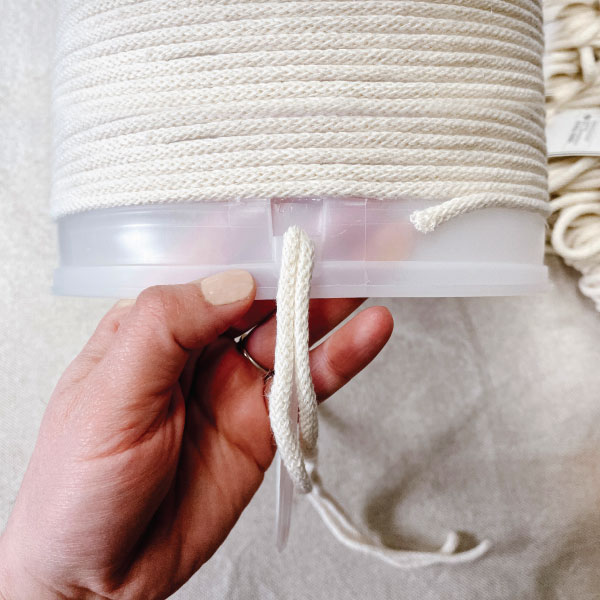
Step 2:
Continue wrapping rope all the way around and secure it with a small bead of hot glue as you go. Be careful not to use too much glue. Stop when you get to the bottom of the top rim and glue the end up, onto the rim. Don’t worry, this will be neatly covered up later.
Step 3:
Cut 2 pieces of rope slightly longer than the handle. Run a bead of hot glue over the handle and glue both pieces on top of the handle, side by side.
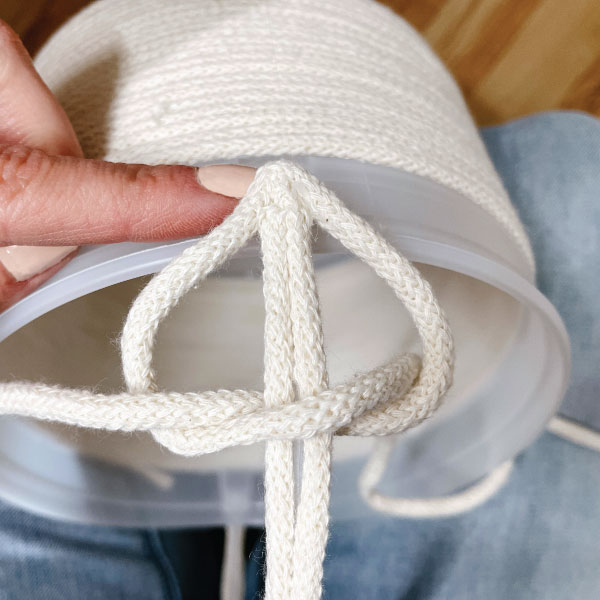
Step 4:
Cut one piece of rope to 20 feet. Find the middle and glue it around one end of the handle, as shown in the photo. Let dry then begin tying a macrame square knot down the handle. There are lots of great YouTube tutorials on tying a square knot and it’s really easy once you learn. Alternatively, you could braid it or just wrap another cord around it for a more twisted look.
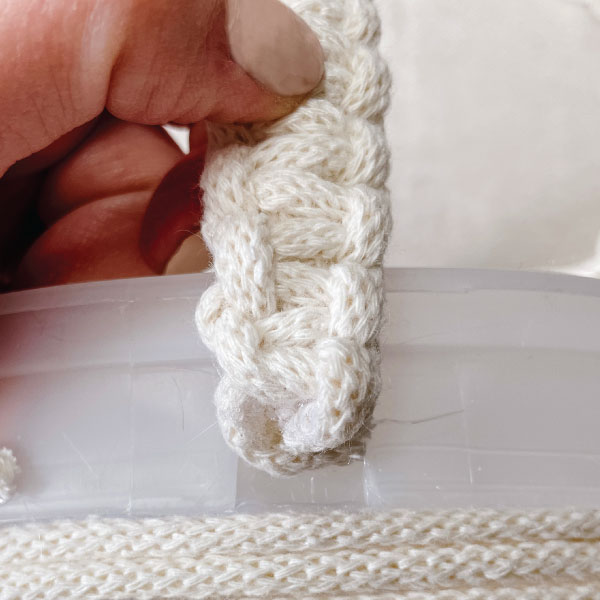
Step 5:
Once you reach the end of the handle, trim the excess rope and use hot glue to secure it in place.
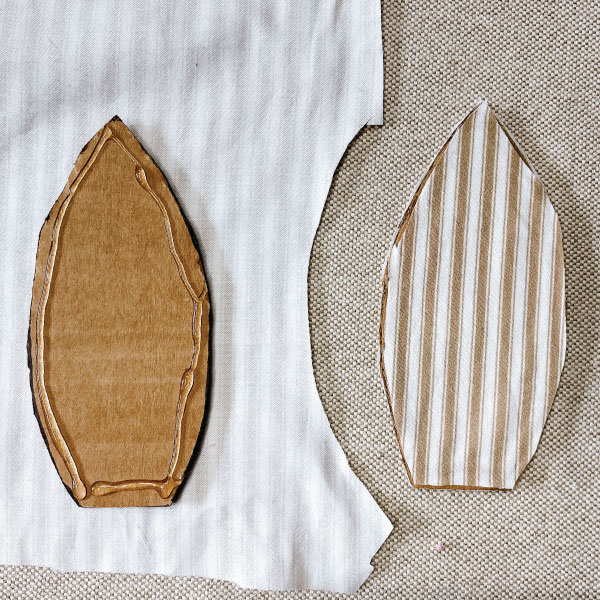
Step 6:
Cut out ears from corrugated cardboard (more recycling)! Place hot glue around the edges and cover with fabric. I used some cotton I had on hand, but you could use any scrap fabric, old or thrifted sheets, pillow cases, etc. Be creative and use what you have! Trim around the fabric, then hot glue the other side and trim the fabric to the same shape as the ear. Repeat to make two ears.
These ears are about 2 1/4” wide and 5” tall.
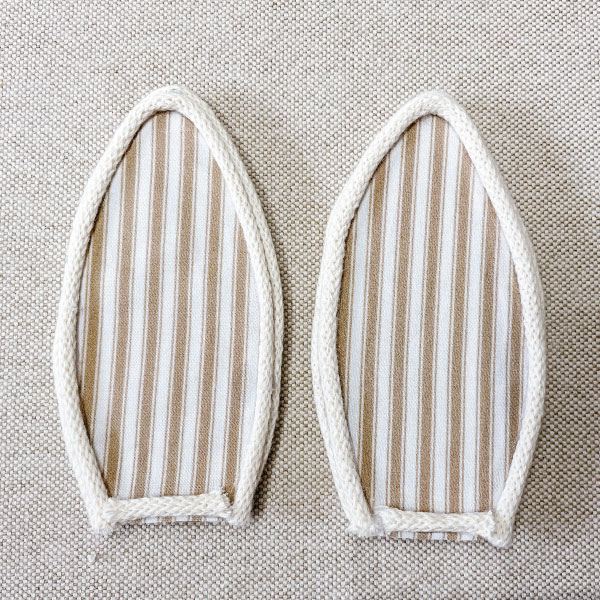
Step 7:
Hot glue some rope around the exposed ends of the corrugated cardboard and around the front and back perimeter of the ears. On the front of the ears, place a small piece of rope on the bottom edge. This will be used to secure the ears to the basket.
Step 8:
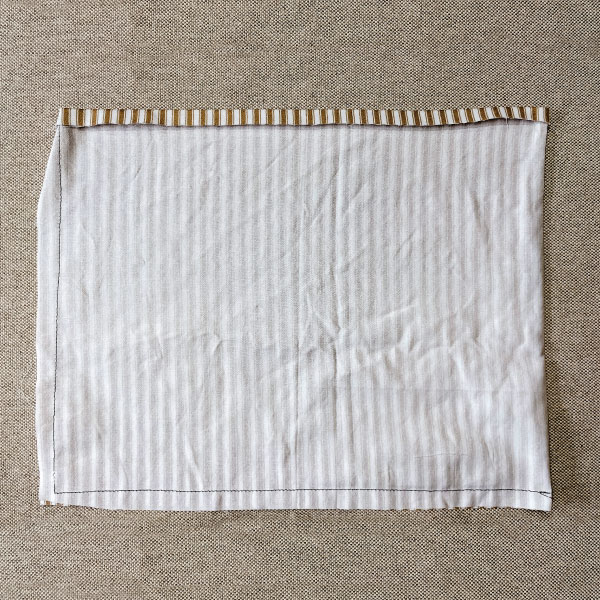
Using the same type of fabric as the ears, cut a piece 26 1/2” wide by 10 1/2” long and fold in half. Sew along the exposed side edge and the bottom edge, as shown in the photo. I used a darker thread to show the stitch line. You could also hand sew or just use hot glue!
Fold and iron the top edge about 1/4” to the inside. NOTE: the fabric shown in the photo is inside out. Once sewn or glued, flip it the right way around and place it inside the bucket to line it.
Step 9:
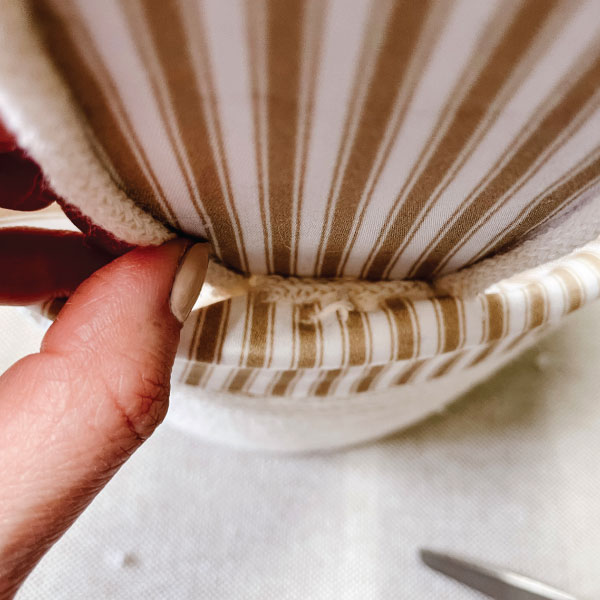
Fold the inside fabric over the top edge of the bucket and glue around the top rim. This will cover the exposed rope that ended at the top.
Cut a small hole in the fabric on the inside rim where you are going to place the ear. Fill with hot glue, then press the ear firmly against the front edge of the basket until it dries. This is important to ensure the ear is secured to the basket, and not just to the fabric. Repeat for the second ear.
Step 10:
Fill your handmade easter baskets with all your favourite things! If you want to give your goodies some volume, cut or shred newsprint and place in the bottom of the baskets. I did this and it looks great! Our basket includes Jan & Jul’s UV Swim Wear, Water Repellent Xplorer Hats and swim passes for our local pool. I think this is the perfect experience-based gift because my kids love to swim in the pool and the lake. These items will serve us well all spring and summer long! Jan & Jul’s Sunglasses and Knit Shoes are also great options, both of which my kids have and love.
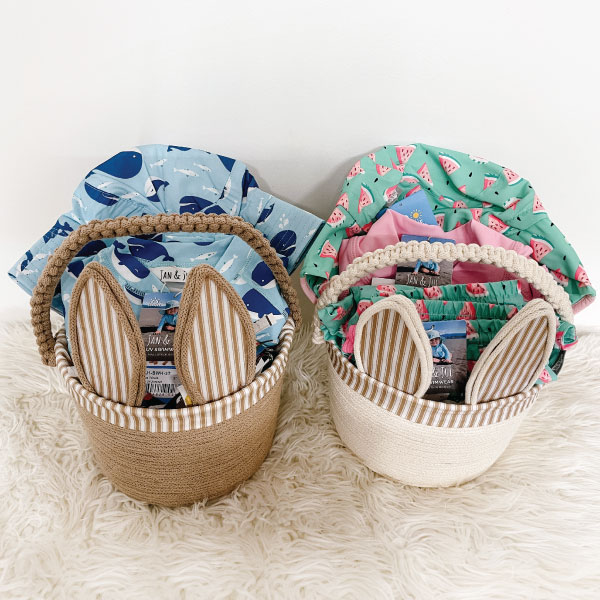
What do you think? When I mentioned handmade Easter baskets made from recycling, I bet you weren’t picturing a bunny this cute! You could add a face too, but I liked it without. I encourage you to make yours with material you have or are able to easily source! For daily DIY and Craft inspiration, connect with me on Instagram @sewbrightcreations or YouTube. I can’t wait to see what you make!
xo Jackie, Northern BC Mom & DIYer